Showing posts with label Sweets and Treats. Show all posts

June 17, 2009

Mint Chocolate Cream Cheese Brownies

Does the name alone have you swooning? Oh yes, they are just as good as they sound. Maybe even better. Grace, of A Southern Grace, made these a while back, and let me just send a big ole "Thank-You" her way, cause these babies rock! Cream cheese brownies were already one of my favorite desserts, but the mint in these took them to a whole nother level. 

Considering that the mint oreo balls I made over St. Pattie's day were one of my most well received goodies ever, I should have known that there was something to this whole chocolate and mint thing. It's not just for girl scouts anymore! Keep the leftovers (if there are any) in the fridge, as they are totally awesome cold. 

Mint Chocolate Cream Cheese Brownies
Courtesy of A Southern Grace, who adapted the recipe from Here

6 tablespoons butter
4-ounces mint chocolate, chopped
2/3 cup sugar
2 eggs, at room temp
1/2 cup flour
1 tablespoon unsweetened cocoa powder
1/8 teaspoon salt

Filling:
8-ounces cream cheese, at room temp
1 egg yolk
5 tablespoons sugar
1/8 teaspoon mint extract
1/2 cup chocolate chips
  • Preheat oven to 350℉.
  • Spray a 9-inch square pan with non-stick spray.
  • In a large bowl, combine chopped mint chocolate and butter and melt in microwave on low. Start with 2 minutes, then stir, and continue cooking at 30 second intervals until completely melted.
  • Beat in sugar and eggs.
  • Add in flour, cocoa powder, salt and vanilla, and mix until combined.
  • Pour into pan in a thin even layer.
  • In a separate bowl, beat together the cream cheese, egg yolk, sugar and mint extract until smooth.
  • Stir in chocolate chips. 
  • Place dollops of cream cheese mixture sporadically over the initial brownie layer, and using a dull knife, swirl together.
  • Bake for 25-30 minutes or until that batter in the middle is just set.
  • Let cool and cut to serve. I also preferred these chilled, so I kept them in the fridge. 

June 4, 2009

Strawberry Gelato

This post is going to be short and sweet today. Mainly because I have forfeited my life over to a series of books that have captured the hearts of teenage girls everywhere. Yes, I am slightly embarrassed to say that I have jumped on the Twilight bandwagon. I know I'm a little late to the party, but I'm sure making up for lost time. I simply cannot put these books down! They have me completely mesmerized and life as I know it is paused until I've read every last word. 

I did, however, manage to pull myself away long enough to use up some of the seasons beautiful strawberries in this delicious gelato. It's pretty and pink and tastes just like fresh berries. And I can vouch that it makes for a fabulous breakfast (what, there's milk and fruit in it!). If you aren't the proud owner of an ice cream maker, I would highly recommend that you get yourself one asap. Not only is it fun and easy, but there is just no beating freshly made ice cream.

I also want to thank everyone so much for the wonderful well wishes for my 1 year. I've had such a great time writing this blog, and am so blessed to have made so many wonderful friends through it. Thank-you so much for always being so supportive and motivating! 

I also want to mention that one of my family's dear friends has a wonderful art blog (she is a fantastic artist) and is having a giveaway for one of her very special pieces. Please do go give Kendall a visit at Kendall Boggs Fine Art.

Strawberry Gelato
Adapted from Bon Appetit via La Divina Gelateria in New Orleans

3/4 cup sugar
1 tablespoon cornstarch
1 cup whole milk
3/4 cup heavy whipping cream
2 1/4 cups sliced hulled strawberries
2 tablespoons pomegranate juice
  • Whisk together sugar and cornstarch in a medium saucepan.
  • Whisk in milk and cream and continue whisking while cooking over medium heat until it begins to thicken and bubble (about 5 minutes).
  • Pour liquid into bowl that is placed over ice and let chill slightly, stirring occasionally.
  • Puree strawberries in blender, then strain into the slightly cooled base liquid.
  • Stir in pomegranate juice.
  • Chill for 3 hours.
  • Process in ice cream maker per maker's instructions (mine took about 25 minutes).
  • Freeze at least 3 hours and up to 2 days.

May 21, 2009

Because Cupcakes Are So Last Year

For years, every birthday in our house has included the infamous Magnolia Bakery cupcakes. People line up around the block waiting to get into the itty bitty store in the west village to buy of box of these treasured cupcakes. Truth be told, I'm not the biggest fan of the traditional vanilla or chocolate. They are a little grainy and dry and the frosting makes my teeth hurt just thinking about it. Some of the other flavors like spice or red velvet are okay, but they aren't the real star of the show. The real star is the banana pudding. It is absolutely ta-die-for, and has long been dubbed by Brad and I as the best dessert in nyc. 

For his birthday this year I decided to make the pudding myself instead of going out and buying a tub. I was completely shocked how easy it is to make. I was even more shocked that it tastes identical, if not better, than the one from the bakery. Score!! Seriously, if you are a banana pudding fan this absolutely must go on your "to make now" list. And if you are in ny you can also swing by and grab you some of the goodness (Buttercup carries all the same items as well, but wasn't mentioned on Sex and the City, so it's usually way less crowded).

Magnolia's Famous Banana Pudding
Recipe Courtesy of More from Magnolia

1 14-ounce can sweetened condensed milk
1 1/2 cups ice cold water
1 3.4-ounce package instant vanilla pudding mix (Jell-O brand recommended)
3 cups heavy cream
1 12-ounce box Nabisco Nilla Wafers (substituting not recommended)
4 cups sliced ripe bananas
  • Beat water and condensed milk together with an electric mixer until well combined (about 1 minute, and be careful, this one can fly every where!)
  • Beat in pudding mix for 2 more minutes.
  • Cover with plastic wrap and chill for 4 hours or overnight.
  • Whip the cream with an electric mixer until stiff peaks form.
  • Gently fold the whipped cream into the pudding.
  • To assemble, do alternating layers of wafers, banana, and pudding. Make as many layers as you like and divey up the ingredients accordingly (you could also make individual portions in stemless wine glasses like I did).

May 1, 2009

Remember that thing about eating healthy....


Well that is out the door! Ladies, would you all back me up when I say that at certain times of the month (guys, don't squirm too much, this is as in depth as I'm going to go), we are simply slaves to our cravings. I mean all the good intentions in the world aren't going to fight off the chocolate, then salty, then sweet, then sour, and back to chocolate cravings. We might as well just throw up our hands, eat what we are craving, and get over the guilt cause it's all mother nature's fault. It has absolutely nothing to do with complete lack of self control. Or at least, this is what I like to tell myself. Note - this is only a good excuse for a limited amount of time, and if you start using it every day you will certainly be the size of a house. :)

So what's a gal to do when she has dutifully passed up on the Oreos in the grocery store so that there aren't any sweets around the house to "cheat" with, but is ready to bang on her neighbors door begging for a snickers? Make these chocolate and peanut butter cookies. You already have the ingredients on hand, and will be able to indulge your gluttony without anyone else being the wiser. And I can just about guarantee they will tame even your wildest of cravings. It's like getting a zpack from the doctor, it will cure just about anything. So give in and make a few cookies (cause you know that sugar-free pudding isn't going to fool you). And when you are feeling nice and satisfied, give the rest away. Maybe karma will even throw you a bone for spreading around the goods and you'll magically start craving celery. 

We are off to Vegas for the weekend, so hopefully some of that karma will be working our way. Heck, I'm just hoping I don't get swine flu on the flight there!

Peanut Butter and Chocolate Cookies
Adapted from The Magnolia Bakery Cookbook

1 1/4 cups AP flour
3/4 teaspoon baking soda
1/2 teaspoon baking powder
1/4 teaspoon salt
1 stick unsalted butter, softened
3/4 cup peanut butter, at room temp
3/4 cup sugar
1/2 cup light brown sugar
1 large egg, at room temp
1 tablespoon milk
1 cup chocolate chips (I like the mini chips the best)
  • Preheat oven to 350℉.
  • Sift the flour, baking soda, baking powder, and salt together in a medium bowl and set aside.
  • In a large bowl, or mixer, beat together the butter and PB until light and fluffy.
  • Add in both sugars and continue beating until smooth.
  • Stir in the egg and milk.
  • Stir the dry ingredients into the wet.
  • Fold in the chocolate chips.
  • Place teaspoon size balls of dough onto an ungreased cookie sheet, then press gently with the back of a fork.
  • Bake for about 10 mintues (the cookies are best slightly undercooked, as they will harden quickly when taken out of the oven).
  • Place cookies on racks to cool.

March 19, 2009

Housewife's Banana Bread

I'm pretty sure that everyone already has their favorite banana bread recipe. I know I do - my mom's. This is not a post for hers though, because see the thing about my mom's banana bread is, that it's simply hers. It's what she's known for and I'm pretty sure that if I ever tried to make it, there would be no chance of it tasting as good as when she does. Guess it just has that extra little "mom factor." So, I'll stick with having her mail us loaves and loaves (seriously, the UPS guy knows her by name).

For this same reason, I usually steer clear of most banana bread recipes. This one piqued my interest though (when I first saw it on Noble Pig, but actually got it's origin from Leslie at The Hungry Housewife -- love both of them!), because of the ingredients. Essentially, Leslie took a plain jane banana bread and gussied it up into something really different and special. It has coconut and blueberries, in addition to walnuts, if you're into that sort of thing. This was entirely different than my mom's, and in the end I decided was even more like a blueberry bread. And it was delicious! My only mistake was forgetting to set the timer (or I actually set it on the microwave and someone -- ahem -- messed with it!), so it got a little overcooked on the edges. Nothing a little doctoring couldn't fix.

So even if you have a go-to banana bread recipe, I would encourage you to try this one for a change. I mean we all have black bananas in the freezer, right? I liked mine best slightly heated in the microwave with a big smear of butter.

Please click HERE to get the recipe and to pay Leslie a little visit. The only change I made was to add a few more blueberries (which I highly recommend!). I think I would also leave out the walnuts next time as well, but that is entirely up to you and yours. 

March 13, 2009

Festive Oreo Truffles

How fun and adorable are these?! I got this idea last year from Barkerella (I'm sure you all already love her site, but if you haven't visited, be sure to!), and thought they would be perfect for our little get together this weekend. They are made with mint Oreos (which taste just like thin mints), which are ground up and combined with cream cheese, then dipped in colored candy coating. You could really make them for any holiday depending on what color candies you used. 

These would be fantastic to make with your kids. They are a lot of fun, and you use your hands for most of the work. Mine weren't dipped perfectly, but when you pile them all together, I doubt anyone would care. And they are so good! Really sweet, really addictive. The little ball form makes them way too easy to just eat one right after another. And if you aren't a mint fan, go ahead and use the plain Oreos. I'm sure those would rock as well.

I still have more recipes for the 17th to come, including a kicked-up lamb stew and a fun green punch. Who knew St. Pattie's day could be so much fun, even before the drinking starts?!


Mint Oreo Truffles
Courtesy of Bakerella
Makes appx. 4 dozen (So be sure to share!)

1 package Cool Mint flavored Double Stuffed Oreos
- use 22 whole cookies
- use 10 cookies with cream centers discarded
8-ounces cream cheese, at room temp
chocolate bark or candy coating (I used Wilton's Brand, which you can order online)
  • Place all cookies in a food processor and pulse to a fine crumb. You could also put them in a plastic bag and crush them with a rolling pin.
  • Stir together crushed cookies and cream cheese. I found it easier to get in there with my hands like you are making meatloaf.
  • Roll into 1-inch balls (I used a mini-melon baller gadget) and place on wax paper lined baking sheet.
  • Place balls into the fridge or freezer to slightly harden.
  • Melt candies according to instructions.
  • Dip chilled balls into melted candies, then place back on wax paper to dry. (You might need to stick balls back into fridge for a few minutes to keep them chilled, which will make them easier to work with).
  • Once candy coating has hardened, you can drizzle or decorate with a contrasting color.
  • Keep refrigerated.

March 9, 2009

Donuts!

Emily, over at Sugar Plum, always has the most creative and decadent looking goodies. She is constantly coming up with savory and sweet treats that I instantly want to try. This is exactly what happened the other morning when I strolled over to her site and saw these. Donuts! Bananas! Peanut butter glaze! OMG! Needless to say, 30 minutes later I was devouring these little bundles of deliciousness. I dipped half into the peanut butter glaze and half into powdered sugar. Both were totally amazing.

She entered these into a Top Chef/Quaker Oats competition, and she was chosen as one of the finalist! Yay! Congrats Emily! To vote for her and to see the recipe, please click here. Honestly, anyone who can make oats taste this good, is a winner to me!

Also a huge, huge thanks to Donna-FFW (firefighter wife) of My Tasty Treasures for this award!! She is absolutely hysterical, and if you aren't already completely addicted to her site, you must go check it out! Not only does she have amazing food, but she will keep you in stitches the whole time you are there. There is no filter with Donna!!

With this award you are supposed to list 10 facts about yourself. So here it goes:

1) I have really strong political and religious opinions. So much so, that I know better than to air them out here!
2) I love to run, run, run! The NYC half-marathon is my favorite race ever.
3) In my totally unbiased opinion, I have the cutest dog in the entire world. Isn't she adorable in her birthday dress?!
4) I graduated from Ole Miss with a 4.0 GPA and a finance degree (and still partied like a rock star!).
5) Most days I feel like I'm playing house, and can't believe I'm actually an adult.
6) I'm a total shoe and bag addict. Recession or not, I love me some Louboutins!
7) I'm still trying to figure out what I want to be when I grow up.
8) Almond Joys are my favorite candy of all time.
9) I'm a Kappa Kappa Gamma and spent some of the best years of my life in that sorority house.
10) I'm clueless with computers and am amazed that this little blog is even up and running!

I want to pass this award along to Debby over at A Feast for the Eyes. Debby has so many wonderful dishes on her site, you just won't know what to do with yourself! She's a wife and a mother, and one heck of a lady. Please go check her out!

March 3, 2009

Apple Brown Betty

Whenever I'm at the store and throw a bag of apples in my cart, I give myself a little mental pat on the back. I mean apples are loaded with fiber and nutrients, not to mention the whole "keep the Dr. away" thing. But, deep down, I know this is not the way the story is gonna play out. Inevitably, I cut them up and top them with cheese or peanut butter. Or I bake them in the oven with butter and cinnamon. Or I make this brown betty. Cause once you make this, well, it's just impossible to be satisfied eating a plain old apple ever again.

We aren't reinventing the wheel here or anything, but this dessert is a classic for a reason. In fact, I'm going to finish off some of the leftovers and continue my day of hibernation. As a girl from FL, I just don't comprehend how anything is supposed to get done when there is snow everywhere. Enjoy!


Apple Brown Betty
Southern Living Best Recipes Vol. 4

8 white bread slices, chopped
1/3 cup butter, melted
1 cup brown sugar
1 tablespoon cinnamon
4 granny smith apples, peeled, cored and sliced into 1/4-inch thick pieces
1 cup apple cider
  • Preheat oven to 350℉.
  • Lightly grease a 8-inch square baking dish and set aside.
  • Place bread in a food processor and pulse until mixture resembles fine crumbs.
  • Stir together bread crumbs and butter.
  • Stir together brown sugar and cinnamon.
  • Lay 1/2 apple slices in bottom of baking dish and top with 1/2 brown sugar mixture and half of the bread crumbs. Repeat for a second layer.
  • Pour apple cider over top (allow to sit for 15 minutes if desired).
  • Bake for 55 minutes, and let stand for 10 minutes prior to serving.

February 20, 2009

The Vanishing Cake....

This cake rocks my world. It is sooooo good! This is the second time I've made it, and I'm telling you people, it is awesome. I'm surprised it even made it into the cake pan because I kept eating the batter! I made this one night when Pete and Dana came over for dinner, and they loved it as well. Between the four of us, this whole cake went up in smoke in less than a day. One day! Oh, my poor hips.

The cake is so moist and delicious, with bites of gooey fig jam and a to-die-for buttermilk frosting that seeps through the whole thing. Yes, the fruit and milk combo makes this a perfectly acceptable breakfast item. If it makes it to the next morning that is. And of course, it only gets better the longer it sits around.

Did you know that if you are out of buttermilk, you can substitute by combining 1 tablespoon of vinegar or lemon juice and 1 cup of milk and letting it stand for 10 minutes? I bet you knew that already. I learned this while reading this recipe about a year ago and it has been one of my go-to tricks ever since. 

Pecan Fig Cake with Buttermilk Glaze

Cake:
3 eggs
1 1/2 cups sugar
1 cup oil
2 cups AP flour
1 teaspoon ground nutmeg
1 teaspoon ground allspice
1 teaspoon ground cinnamon
1 teaspoon salt
1 teaspoon baking soda, dissolved in a little bit of hot water
1/2 cup buttermilk
1 teaspoon vanilla extract
1 cup fig jam or coarsely chopped preserved figs
1 cup pecans

Buttermilk Glaze:
1/2 cup buttermilk
1/2 cup sugar
1/4 cup butter
1 1/2 teaspoons cornstarch or flour
1/4 teaspoon baking soda
1 teaspoon vanilla extract

Cake:
  • Preheat oven to 350℉.
  • Butter and flour a 10-inch tube pan.
  • In a large bowl, beat eggs for a few minutes or until they become light yellow and smooth.
  • Add sugar and oil and beat well to form a smooth, thick batter.
  • In a separate small bowl, sift together the flour, nutmeg, allspice, cinnamon and salt.
  • Add 1/2 flour mixture to egg batter and stir with a large spoon to combine.
  • Add buttermilk. 
  • Add remaining flour mixture, baking soda and vanilla extract, stirring to combine.
  • Gently stir in figs and pecans, just mixing till evenly distributed.
  • Scrape batter into prepared pan and bake for 40-50 minutes, or until the cake is browned, firm on top and a wooden skewer inserted in the center comes out clean.
  • Cool cake in pan on top of a wire rack for 15 minutes.
  • To remove, run a table knife around the pan and gently turn the cake out.
Glaze:
  • Prepare glaze while the cake bakes.
  • In a medium saucepan, combine the buttermilk, sugar, butter, cornstarch and baking soda, and bring to a gentle boil.
  • Remove at once, stir well and set aside to cool to room temperature.
  • Stir in vanilla.
  • Once cake has slightly cooled, pour glaze over top. If desired, poke small holes in the cake so that the glaze can run inside. (I actually did this while the cake was still in the pan, which made the glaze on the bottom of the cake. Still delicious and less of a mess!).

February 10, 2009

Sweets for your Sweeties!

People seem to feel very strongly about Valentine's Day. Either they love it and get totally into it Martha Stewart style, or they think it's just Hallmark propaganda and boycott the holiday entirely (and share these feelings with any one within yelling range). Personally, I think I fall somewhere in the middle. I appreciate the holiday as a day to express to the ones you love how much they mean to you. We often get lost in the shuffle of our everyday lives, so why not take a minute and recognize those you love. This is not limited to only your main squeeze of the moment, but also to your family and close friends. Everyone appreciates a little card with a cute message! 

I don't, however, think this needs to be done with elaborate handmade crepe paper valentines or expensive gifts. Brad and I still feel like we are coming off the Christmas giving spree, so we rarely give gifts for Valentine's. Instead we opt for cards and food. We usually go to a nice dinner and spend the night drinking wine, eating great food and being sure to order something chocolatey and sinful for dessert. This year, we are actually upping the anti and taking a weekend trip to Disney! Wahoo! As a person who spent 18 years of her life never more than 2 hours away from the most wonderful place on earth, I'm looking very forward to revisiting with Mickey.

But getting back to my point that Valentine's is not solely limited to your honey, why not make a treat that can be spread around, instead of making a fancy chocolate souffle that will only cover one person on your "I love" list. Why not make mini-cupcakes that are decorated in a Valentine's motif?! Kitchy, yes. But it's the holiday people, work with me.

These little beauties are so delicious - moist and dense with a subtle sweetness and chocolate flavor that is only found in a truly special southern red velvet cake. And the frosting, oh the frosting. Cream cheese. I think it speaks for itself. I only used 1 tablespoon of red food coloring so my cakes came out a little pinkish instead of red, but still very festive. I also topped each one with Valentine's M&M's. These went to various places and people I had some of the best responses to these I've ever gotten. Go ahead - show 48 of your friends that you love them with these suckers and see if you don't at least get some candies and kisses in return.


Red Velvet Mini-Cupcakes
Adapted from How Sweet It Is Bakery - Ellen Sternau and Beth Pilar
Yields 48

Mini-Cupcakes:
1 1/2 cups granulated sugar
2 1/2 cups cake flour
2 tablespoons cocoa powder
1 teaspoon baking soda
1 teaspoon salt
1/2 cup vegetable oil
1 cup buttermilk
2 large eggs
1-2 tablespoons red food coloring
1 teaspoon vanilla extract
1/2 teaspoon vinegar

Cream Cheese Frosting:
8 ounces cream cheese
1/2 pound unsalted butter, room temp.
2 cups confectioners sugar
1 1/2 teaspoons vanilla extract 
Valentine's M&Ms or other appropriate decorations
  • Mini-Cupcakes: Preheat oven to 325℉ and line two mini-cupcake pans with wrappers.
  • Mix all dry ingredients together and all wet ingredients together in 2 separate bowls.
  • Pour wet into dry ingredients and stir just until combined.
  • Immediately pour mixture into tins, filling about 2/3 of the way full.
  • Bake for 15-20 minutes, then cool completely.
  • Frosting: Mix butter and cream cheese until smooth.
  • Slowly mix in confectioners sugar and vanilla extract.
  • Place frosting in a piping bag (I used a star-shaped tip), and frost as desired. Or frost using a spatula.
  • Top with decorations.

January 29, 2009

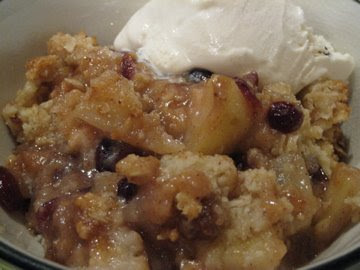
Pear, Apple and Cranberry Crisp

Uuummm... warm fruit and crunchy topping.... I mean is there really anything better on a snowy (i.e. gray slush) day? Ina has done it again! This crisp is so comforting and absolutely delicious. It has beautiful pieces of apple and pear, and tart little bits of dried cranberry. There is also a good deal of cinnamon, which gives it a real warmth, in addition to it being served piping hot out of the oven. As much as I love chocolate (and I LOVE chocolate), this is exactly the kind of dessert I crave when we are camped inside avoiding the wintery weather at all costs. Really, the only thing that got me out of the house yesterday was a trip to Bergdorf's. We gotta support the economy, right?! Thank goodness the sun has decided to show itself today, but the wind is still brutal. 

This is a very convenient dessert to serve when you are having friends over for dinner. Although there is a good amount of peeling and chopping to do, this whole crisp can be prepared before anyone arrives, then just popped in the oven while you are eating dinner. Or you can make it when no one is coming over and cherish the huge tray of leftovers you will be blissfully eating for the next week. Just buy 2 pints of vanilla ice cream. Wouldn't want you to run out and be forced to go to the local bodega to buy ice cream at 2 am in the snow. :)


Pear, Apple and Cranberry Crisp

4 ripe Bosc pears
6 firm apples (Ina suggests Macoun. I used Gala because that was what I had)
3/4 cup dried cranberries
1 teaspoon grated orange zest
1 teaspoon grated lemon zest
2 tablespoons freshly squeezed orange juice
2 tablespoons freshly squeezed lemon juice
1/2 cup granulated sugar
1/4 cup AP flour
1 teaspoon cinnamon
1/2 teaspoon ground nutmeg

Topping:
1 1/2 cups AP flour
3/4 cup granulated sugar
3/4 cup brown sugar
1/2 teaspoon salt
1 cup old-fashioned oatmeal
2 sticks cold unsalted butter, diced
  • Preheat oven to 350℉.
  • Peel and core pears and apples and cut into large chunks.
  • In a large bowl, toss fruit with cranberries, lemon and orange zest and juices, granulated sugar, flour, cinnamon and nutmeg.
  • Pour fruit mixture into a 9 x 12 x 2 inch baking dish.
  • Topping: In an electric mixture with a paddle attachment, combine all ingredients and mix on low speed for 1-2 minutes, or until mixture forms large crumbles.
  • Sprinkle topping all over the fruit mixture.
  • Place baking dish on larger baking sheet to catch any overflow, and bake for 50 minutes to 1 hour, or until the top is browned and the fruit is bubbly.
  • Serve warm with a scoop of vanilla ice cream.

December 23, 2008

Panettone Bread Pudding

You know how sometimes you are introduced to something new, and then you see it just everywhere and wonder how you went so long without knowing it even existed? This is my experience with Panettone. Panettone is a beautiful Italian cake that I've seen many people blog about and is all over the grocery stores and bakeries, but up until about a month ago I didn't even know there was such a thing. 

It really caught my attention when I saw Ina making this bread pudding with it on the Food Network. I've never really been a big bread pudding fan, but Brad and I had just recently had an amazing version at a local Mexican restaurant, so I guess I was in the mood.

It is delicious!! The almond and vanilla extracts give it an amazingly rich flavor. It made me immediately think of amaretto. It also looks beautiful with the little pieces of dried fruit and makes enough for the whole family. This would be the perfect ending to a holiday meal. We ate it after it had been out of the oven for about 30 minutes, so it was still warm, with a big scoop of vanilla ice cream. I'm using every once of self control trying to restrain myself from running to the fridge and stealing a little bit more!

I hope you and your family and friends have a wonderful and safe holiday. See you in the New Year!!

Adapted from Barefoot Contessa  - Ina Garten

1 Italian Panettone, brown outer crust removed
Unsalted Butter, for greasing the dish
3 extra-large Eggs
8 extra-large Egg Yolks
5 cups Half-and-Half
2 tsp Vanilla Extract
2 tsp Almond Extract
1/3 cup Sliced Almonds
  • Preheat oven to 350℉.
  • Cut Panettone into 1-inch cubes and spread out on a baking sheet.
  • Toast cubes for about 10 minutes, or until lightly browned.
  • Grease a 9x13 in. baking dish with the butter, and place bread cubes inside.
  • Whisk together the whole eggs, egg yolks, half-and-half, vanilla and almond extracts and sugar.
  • Pour mixture over bread and allow to soak for 10 minutes.
  • Scatter almonds on top.
  • Place baking dish inside a larger dish.
  • Fill larger dish with hot tap water until it comes about halfway up baking dish.
  • Cover the entire thing with aluminum foil with a few holes cut in it so that it vents.
  • Bake for 45 minutes, being careful not to spill any water into the actual baking dish.
  • Remove aluminum foil and bake for and additional 45 minutes or until light golden brown and the custard is set.
  • Allow to rest for 15 minutes before serving (best warm or room temperature).

December 16, 2008

Vanilla Crescents


On the off chance that your sweet tooth hasn't totally revolted and left for a healthier habitat, here's another one of the Christmas cookies I've been making this year. They are really simple and seem to be a huge hit with everyone. They are sweet and buttery and a great cookie to add to your repertoire. They are especially great because you only need 5 ingredients to make them. Perfect when you have somehow run out of eggs or other fancy ingredients and don't feel like braving the cold to get more.


Personally, I was out of about everything except these five ingredients and there was no chance I was leaving the apartment to run to the grocery. No, the weather in NYC was a balmy 53℉ yesterday, so it wasn't the cold. Let's just say although living 3 blocks from Bloomingdales is a blessing most of the year, it is not so fabulous a week before Christmas. Thank-you tourists for visiting our lovely city and helping our local economy, but please, please, don't just stand with you and 10 of your friends in the very middle of a busy sidewalk. If everyone visiting NYC knew they should move to the side and not create a major sidewalk traffic jam, I guarantee the perception of new yorkers would be much sunnier. Ahh - I feel much better having gotten that off my chest. :)

But back to the cookies - although these are very simple to assemble, you have to be extra careful when baking them, because they can get too toasty very quickly. I learned that the hard way when I had to trash my entire first batch. I also think the original recipe is completely off. It called for them to be baked at a higher temperature and for about 10 minutes longer than I ended up ever having to do for a batch. In the recipe below, I've tweaked it to the times that I ended up using. But if you attempt these, check them often and pull them out before they start to brown at all - by that point you will be too far gone. Just check to make sure that they are slightly firm to the touch.


Vanilla Crescents

2 sticks Unsalted Butter, softened
1 cup Confectioners' Sugar, plus more for dusting
1 1/2 tablespoons pure Vanilla Extract
2 1/4 cups AP Flour
pinch of Salt
  • Preheat oven to 325℉; place one rack in the upper 1/3 of the oven, and one in the lower 1/3.
  • In an electric mixer, combine the butter and 1/2 cup confectioners sugar for 5 minutes.
  • Add vanilla, flour and salt just until combined.
  • On a floured surface, spoon out tablespoons of the dough and roll into 3-inch strips. Form the strips into crescent shapes (make sure the ends aren't smaller than the middle or else they will brown quicker).
  • Place cookies on parchment lined baking sheet and bake for 14-16 minutes (switching oven position halfway), or until the bottoms are golden and the tops are pale blond.
  • Allow to cool on racks for 10 minutes.
  • Place remaining 1/2 cup confectioners sugar in a small bowl (adding more as necessary), and roll warm cookies in it to coat.
  • A few minutes later, repeat the sugar rolling process and allow the cookies to cool completely.

December 12, 2008

Mom's Molasses Cookies


I'm finally able to get out of bed and do some holiday baking - Wahoo!! Even though I'm battling the remains of a terrible cold, I'm not letting it keep me down and miss out on my favorite time of year. Plus, over the next few days I'm visiting some of those folks you don't see everyday, like my hair person and the piano tuner. So I'm being a tough girl and baking up some goodies. 

My mom makes these molasses cookies year round, but their spiced quality and pretty icing make them perfect for the holidays. They bake up thin and moist, which makes eating a dozen in one sitting an absolute possibility. The fresh tasting icing is the perfect contrast to the spiced cookie.

There is no rolling and cutting required. My mom uses a little melon baller to scoop out perfectly shaped cookies every time. When the icing has dried they package up nicely as well. I fit about a dozen into these cute little Christmas take-out style boxes that I got from the container store for like a dollar. Talk about a recession-worthy gift!

I'll be sending a slew of these to my friends far away, since my mom always ships them to me. Even after a few days in a box, they come out perfect and taste as fresh as the day they were baked. Happy holiday baking!!


Mom's Molasses Cookies
Makes about 3 dozen

1 1/2 (12 Tlbs) sticks Sweet Butter, melted (if using salted version, omit additional salt)
1 cup granulated Sugar
1/4 cup Molasses (Grandma's Original Molasses recommended)
1 Egg
1 3/4 cup AP Flour
1/2 teaspoon ground Cloves
1/2 teaspoon ground Ginger
1 teaspoon ground Cinnamon
1/2 teaspoon Salt
1/2 teaspoon Baking Soda
1/4 cup Lemon Juice
3 cups Powdered Sugar
  • Preheat oven to 350℉ and line 2 baking sheets with foil.
  • Thoroughly mix together melted butter, sugar and molasses.
  • Lightly beat egg and add to the mixture; blend well.
  • Sift flour with spices, salt and baking soda, and add to mixture (batter will be wet).
  • Drop tablespoons of cookie batter on foil, leaving approx. 3 inches between cookies.
  • Bake just until they begin to darken; about 8-10 minutes.
  • Transfer cookies to cooling rack.
  • Using mixer, whisk together lemon juice and powdered sugar until a glossy icing is formed (may need more or less lemon juice, so add gradually).
  • When cookies have cooled completely, cover in icing; let dry on racks.

December 5, 2008

Sugar Cookie Fun

For the past few months I've been volunteering as an assistant coach for a non-profit organization called Girls on the Run (GOTR). GOTR essentially partners with local schools and sets up after school running programs for young girls. They are taught about having a healthy body image, working as a team, being a good sport, etc., all while training to run a 1.5 mile or 5K race at the end of the season. The girls I work with are between 3rd and 5th grade, so it's amazing to see girls training for such an amazing feat. I can't even fathom running 3 miles when I was that young!

The girls' big race is this coming Sunday, so all the coaches are putting together a bit of a party for them. I decided to bake sugar cookies and decorate them with all their names and some other cutsey designs. This is one of my first forays into baking cookies from scratch, and the first round did not go over so well. Making the dough was super easy, but after it chilled rolling it out was a nightmare. The dough kept cracking and wouldn't roll, and then when it heated up just enough to get rolled out, it would be to gooey to actually cut out cute shapes with the cookie cutters.

For the second round I decided to go the slice and bake way and roll them in some pink and white sugar. This was SO much easier, and they turned out just perfect. I think I might do these in red and green sugar (or blue and white) for the holidays. And who doesn't love decorating sugar cookies! We use to do it as kids and I guess I haven't outgrown it.

I'm off to our final practice today and to hand out the cute cookies. Hopefully the girls will like them!


Slice-and-Bake Sparkling Sugar Cookies
Adapted from Blueprint Magazine (which is no longer in print...)

1 cup Unsalted Butter
1 cup Granulated Sugar
1/2 teaspoon Salt
1 large Egg
1 teaspoon Vanilla Extract
3 cups AP Flour

For Dough:
  • In an electric mixer, cream butter, sugar and salt until light and fluffy.
  • Add egg and mix until combined.
  • Add vanilla.
  • Add flour slowly, and only mix until incorporated.
  • Divide dough in half and place on waxed or parchment paper.
  • Using the paper, roll dough into a 2-inch wide log.
  • Unwrap from paper and roll in desired sugar color (you could also do nuts).
  • Wrap back in paper and refrigerate for at least 2 hours (or up to 2 days).
To Bake:
  • Pre-heat oven to 350℉.
  • Slice dough into 1/4 inch disks and place on baking sheet lined with parchment paper.
  • Bake for 7-12 minutes, or just until edges begin to brown.
  • Let cookies cool on the sheet.
  • Decorate! (cookies will keep for about a week in an airtight container).